When I moved into my current home in late 2019 one of the first projects I completed was adding a fireplace to my Livingroom. The previous homeowners made a lot of "interesting" decisions but one that stood out was their choice of putting a fireplace in the sunroom but not having one in the living room. The sunroom was an addon to the house and any heat generated in that room was slow to make its way to the rest of the house. The house came with central heating and air, but the artificial heat not only ran up the propane bill but always felt damp, dusty and second rate.
After I installed the new fireplace in the Livingroom, which itself deserves its own entry in the Blag, the first thing I noticed about it was that it had a propensity to smoke. I grew up in Garden Valley CA, well off the beaten path, and was no stranger to fireplaces but this fireplace could not be wrangled. I tried all the common tricks to get it to stop smoking up the house. Cracking the windows, lighting a paper bag to create a draft, I even installed a blower fan on the backside of the fireplace to provide positive pressure. All this helped in a minor way but whenever you opened the fireplace door there would always be a little smoke entering the house. The final straw happened one night when the fire went out, and the negative pressure was so bad in the house that smoke started flowing in the reverse direction into the house through the fireplace air intake. I didn't even open the door this time. The fireplace had become a menace to the house and my family. It was time to solve this problem once and for all.
Step 1: The Final Solution
After years of trying to tame this fireplace, I was completely done messing around with it. I was either going to fix the problem or rip it out of my house and use it as target practice. I needed a solution I know was going to work for good. I searched the interwebs for numerous draft inducing chimney caps and fireplace fans. All seemed gimmicky and I had little faith they would work. Then finally I found a unit called a chimney vacuum. It was an industrial-looking exhaust fan that fit on top of your chimney. I knew I had found my final solution, now it was time to install it.
Step 2: Prep for install
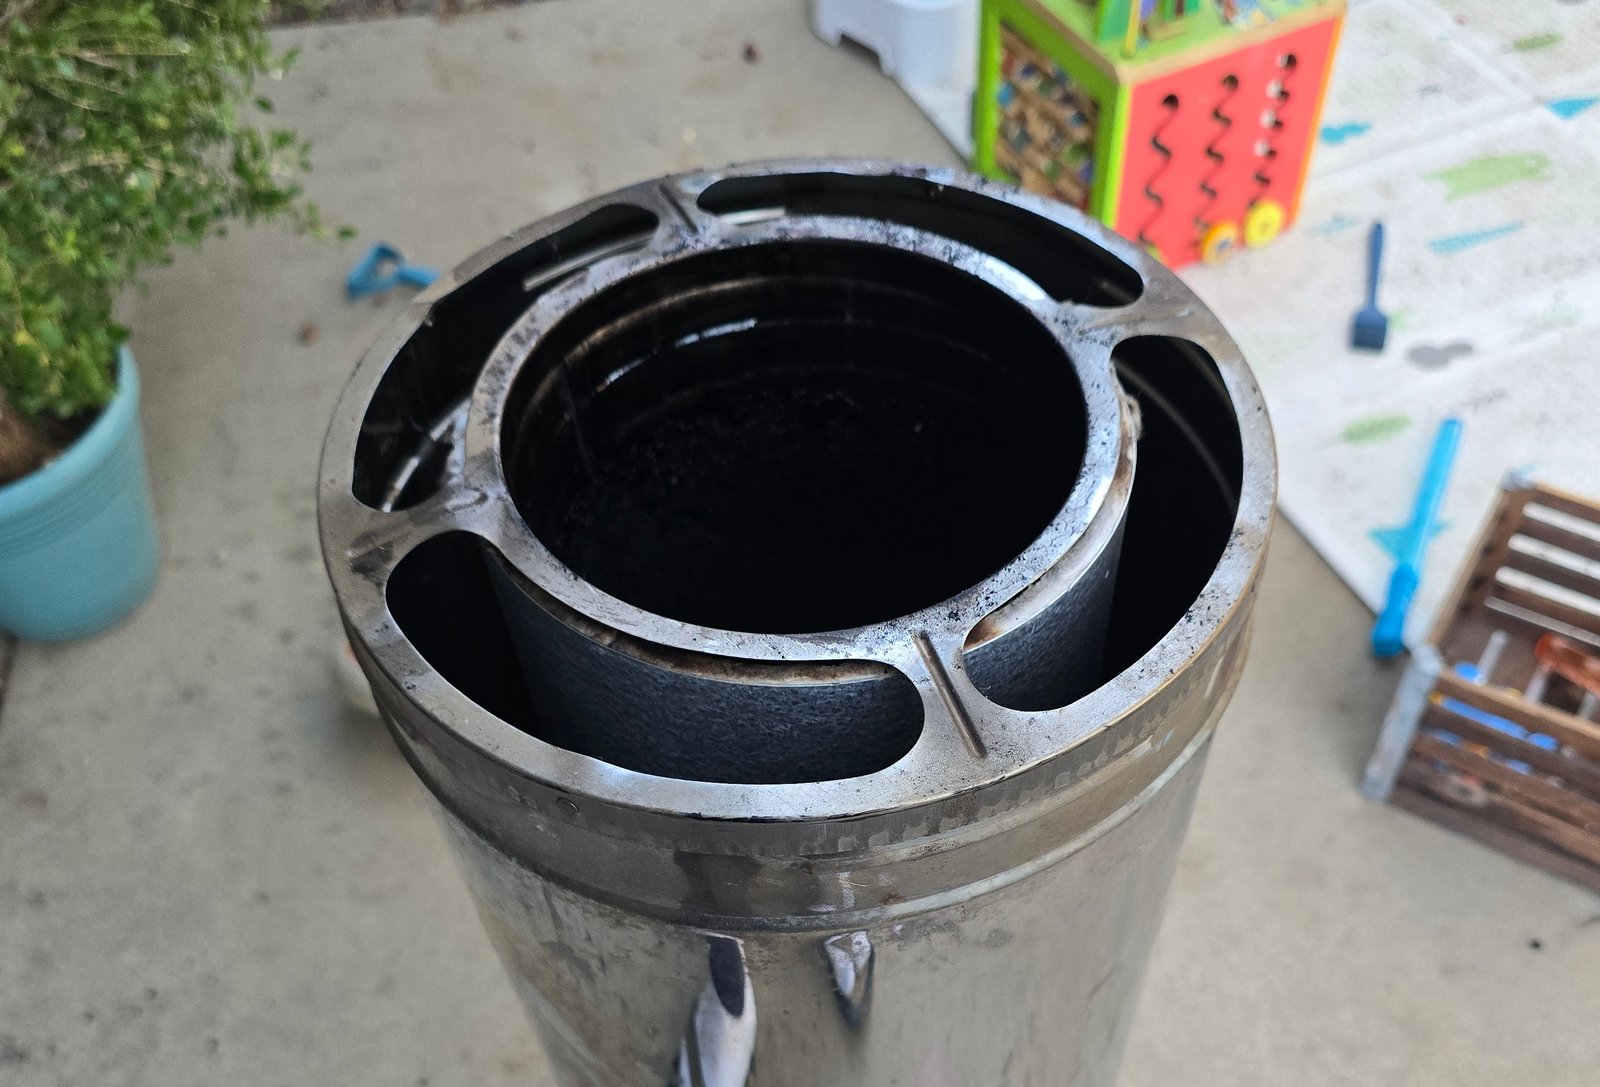
After unboxing my new chimney vacuum I was very impressed with its sturdy well-built feel. It was heavy and the switches on the control unit were quality, with firm tactile positive movements. All the way from Italy and for only around $400, color me impressed. With the unit and my 10in chimney pipe sitting on the ground in front of me one issue became clear. The dead space in the chimney pipe needed to be closed to the environment, otherwise all sorts of debris or animals might try to make their home in there. This used to be covered by the old chimney cap but now I will have to make a cover for it.
Step 3: Filling the gaps
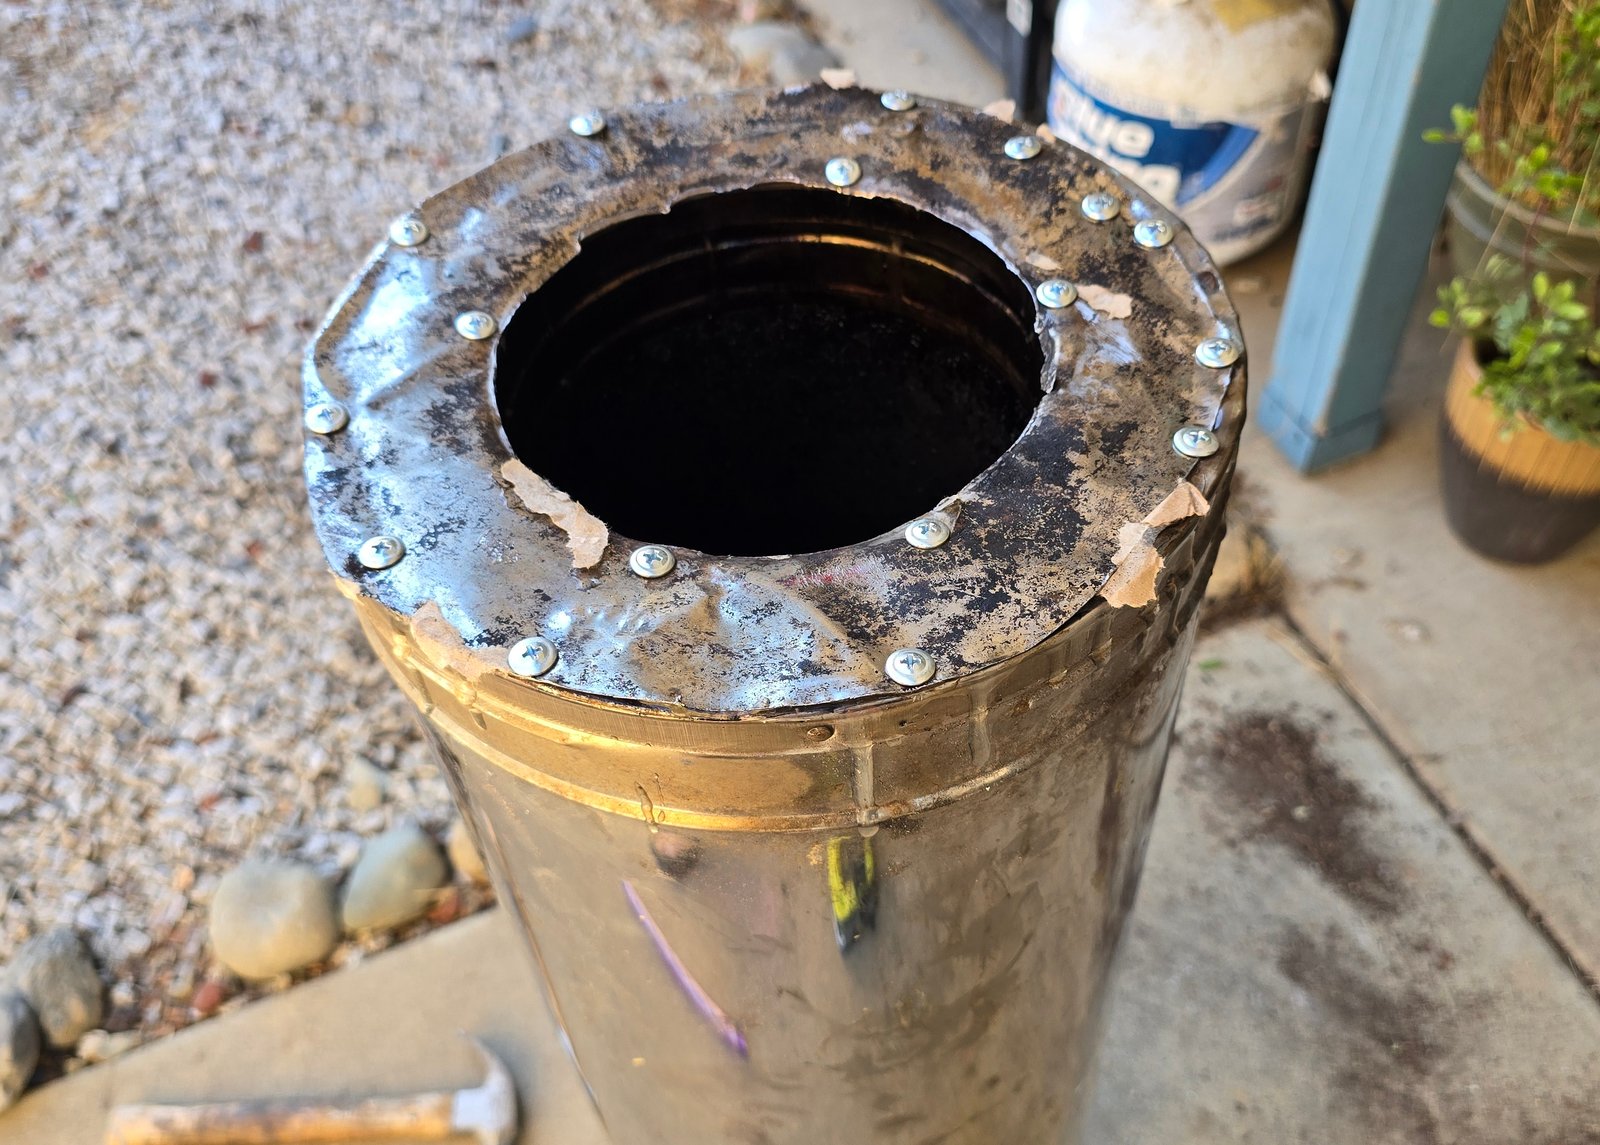
I cut out a donut shaped piece of metal from the old chimney cap and used it to seal the dead space. It was hard to get it from lifting up so held it down with metal screws and sealed the seams with epoxy. With this problem solved we were ready to install the chimney vacuum.
Step 4: Installing the Chimny Vacume
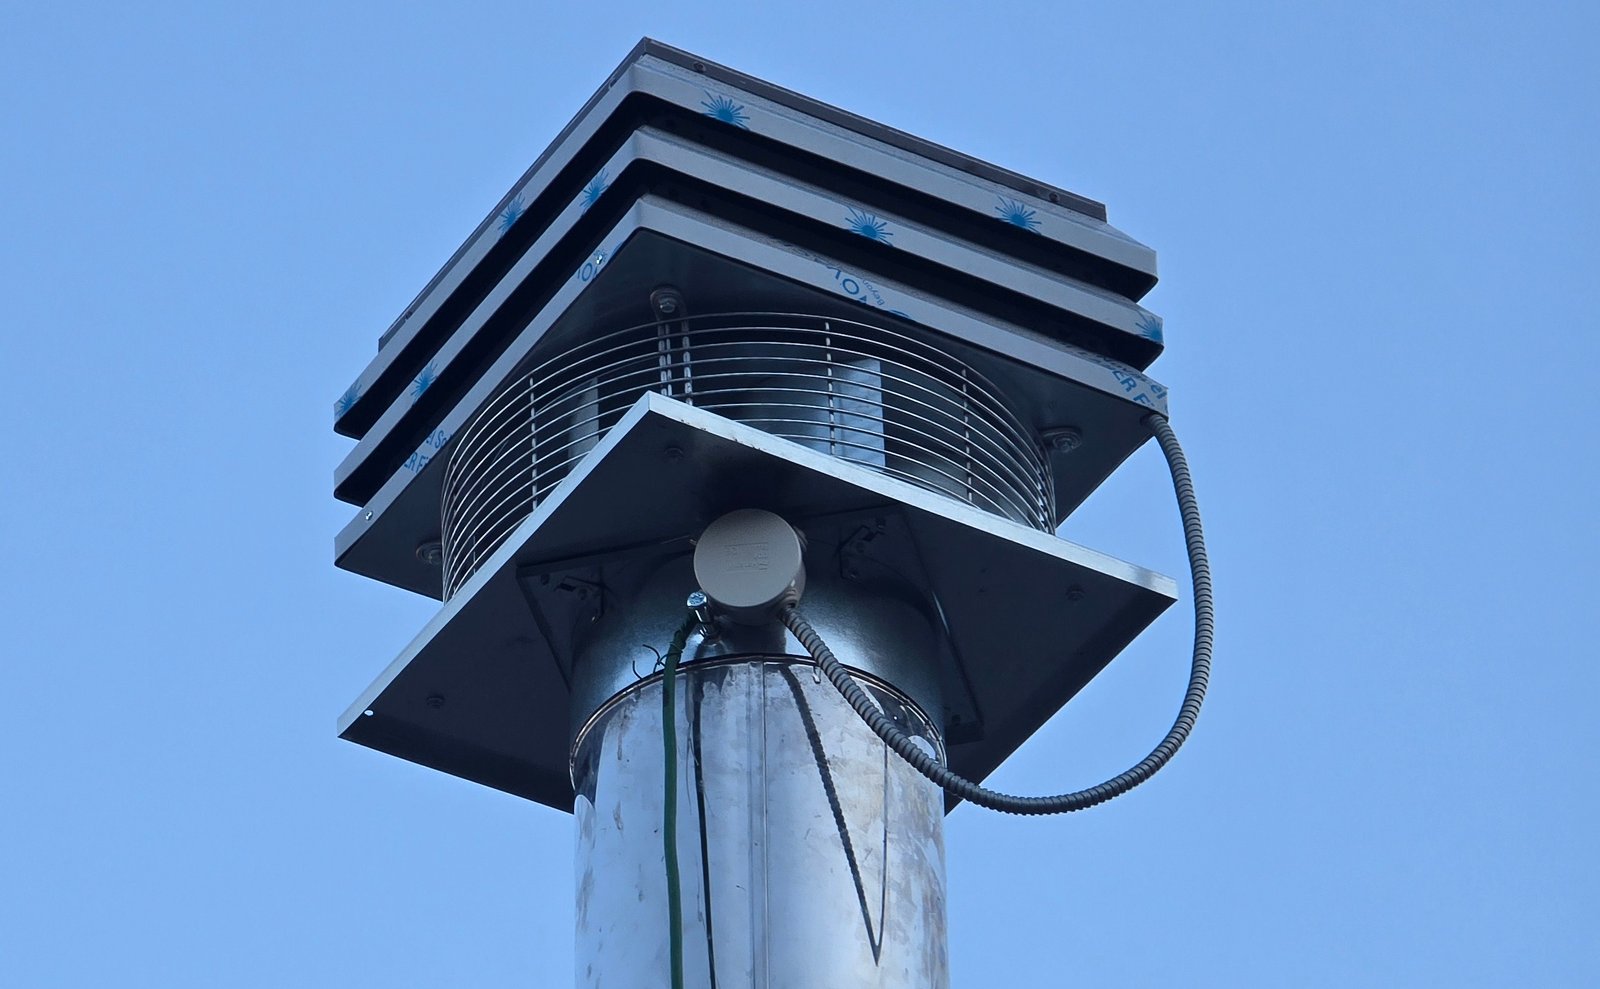
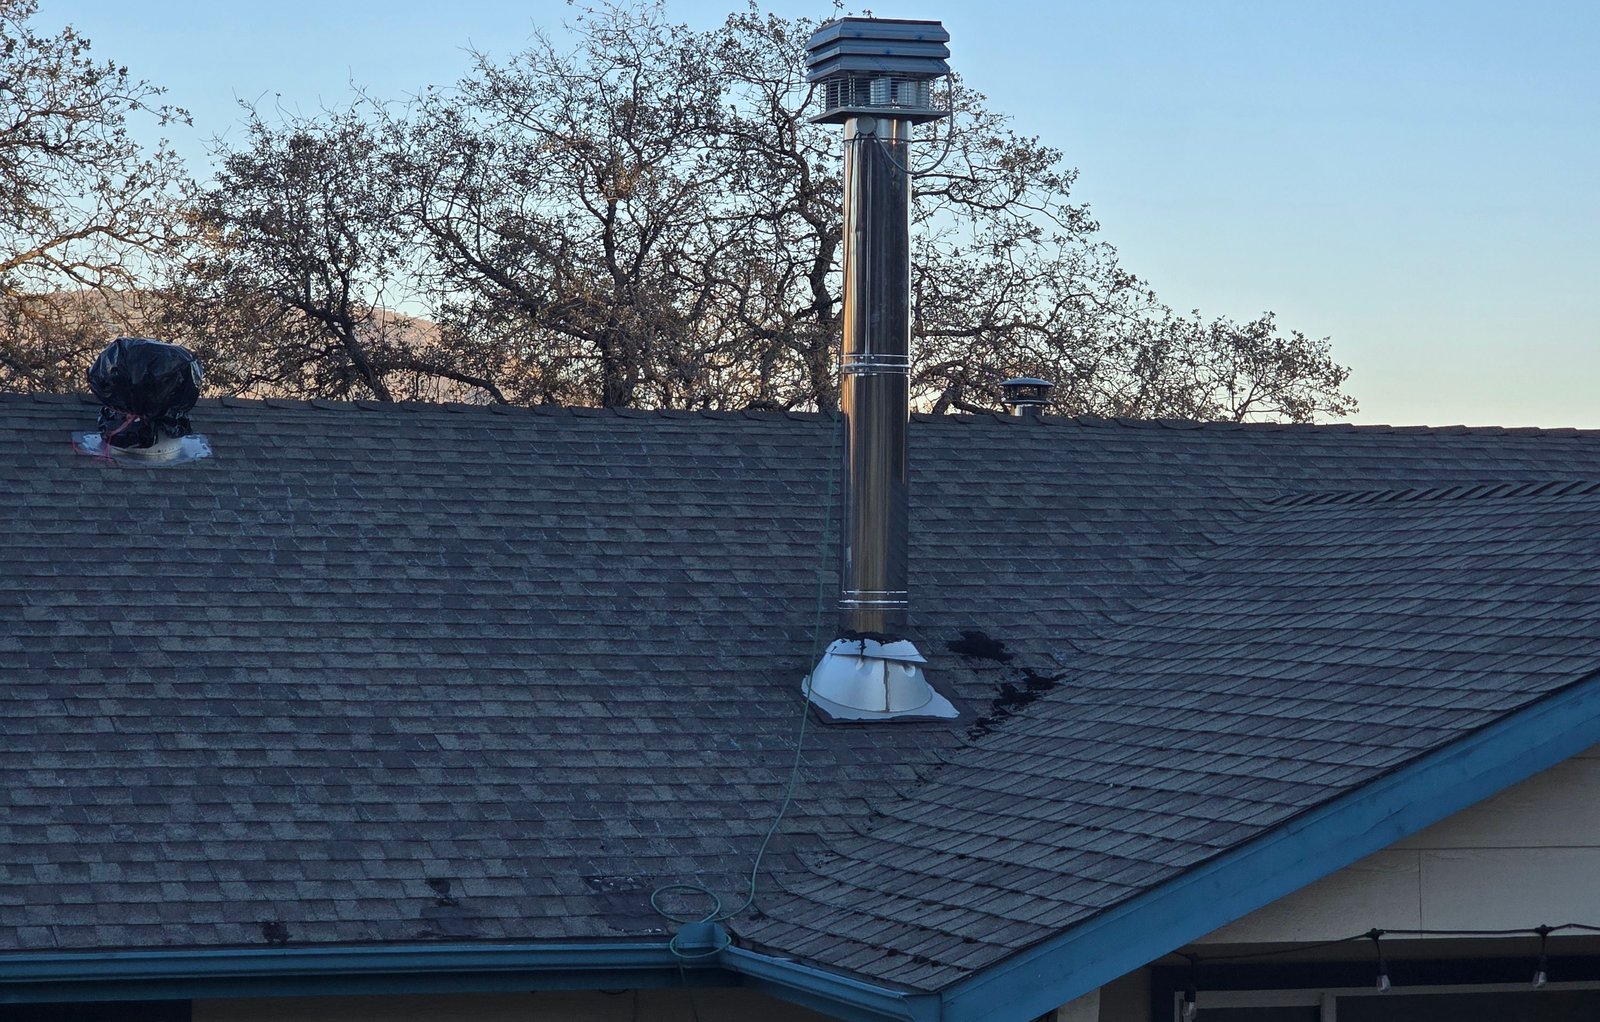
This part sounds complicated, but it really wasn't. I re-installed the chimney pipe with the sealed end and simply lifted the chimney vacuum up and over the chimney pipe. Once on top of the chimney I aligned the vacuum with the walls of the house for purely aesthetic reasons and secured the vacuum in place with several retaining screws that punctured the outer walls of the tripled walled chimney pipe. Now it was time to wire the chimney vacuum. The "right" way to do this would be to run the power wire from the vacuum to a junction box on the roof, into the addict and down an interior wall where I could tie into one of the 120V outlets. I will eventually do this but for now I ran the power cable off the roof, through a cracked window and into a 120V outlet using the prongs from a sacrificial extension cord. Success!
Step 5: Fixing a Damaged Door Seal.
With the chimney vacuum working beautifully another problem became apparent. The felt on the fireplace door was damaged and was leaking air. This was a serious safety concern as the air leak could cause the fireplace to "run away" and get up to dangerously high temperatures. I needed to fix this seal so that I could properly regulate the flow of air to the fireplace.
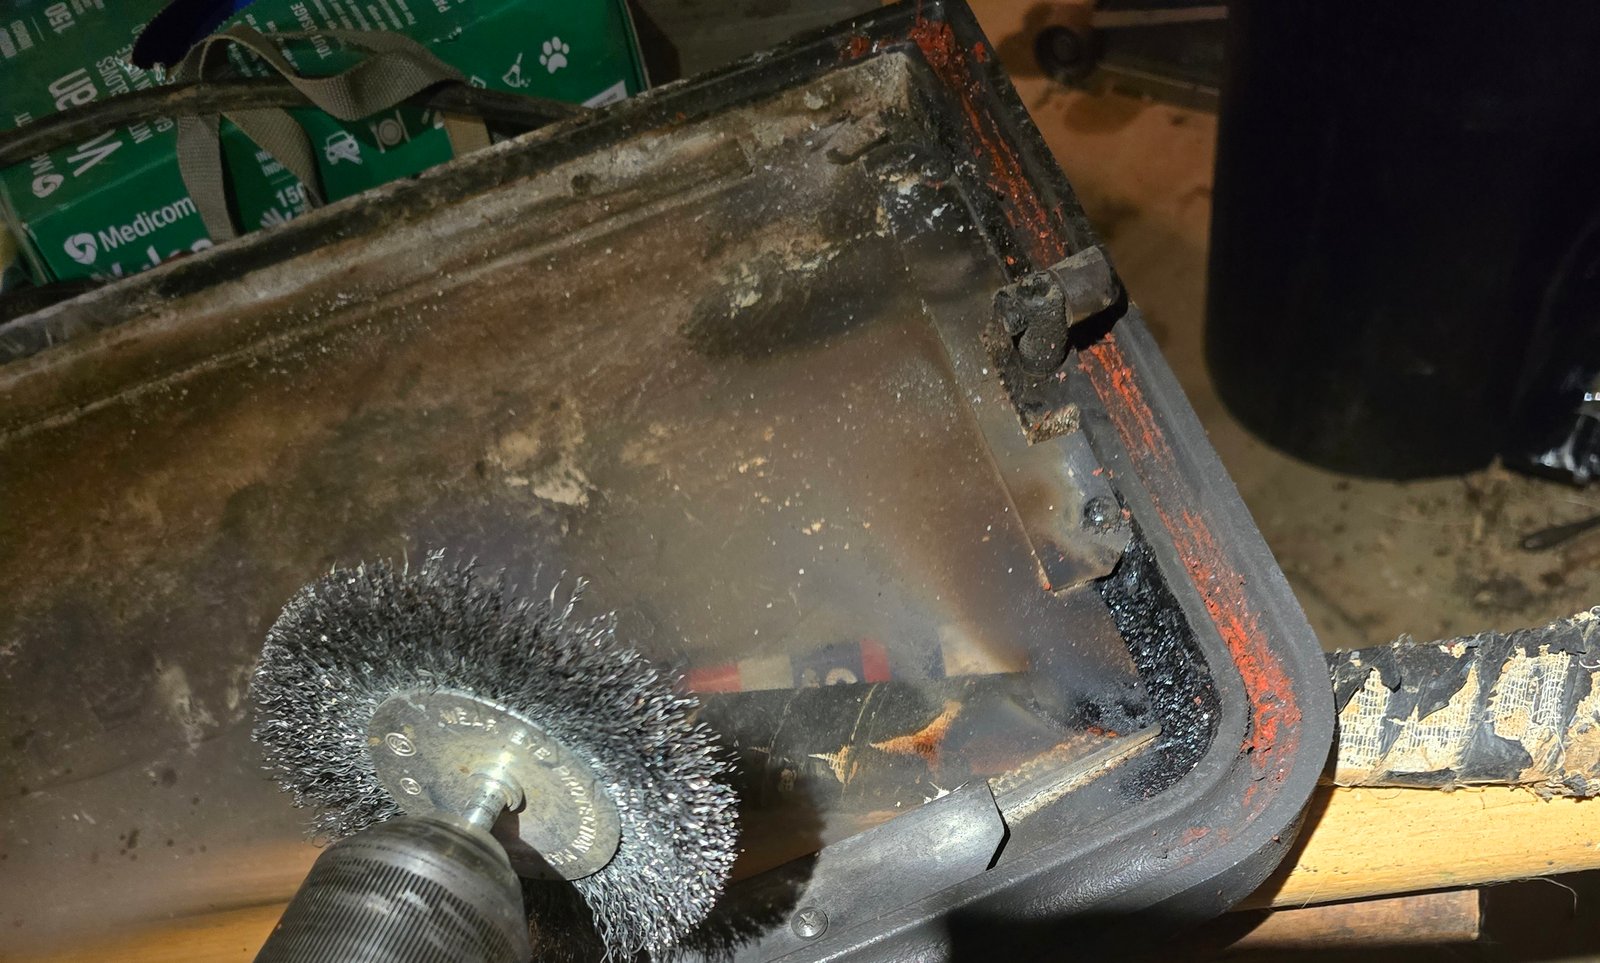
Step 6: Removing the Old Felt.
To replace the old felt first I would have to remove it. It was glued into a groove in the door with a material similar to automative RTV. You could scrap it off, but it was very time intensive. Thankfully I discovered that I could remove the fireplace door and with it removed I brought the door to the garage and removed the glue with the help of power tools. A wire brush on a drill turned out to be the perfect combo.
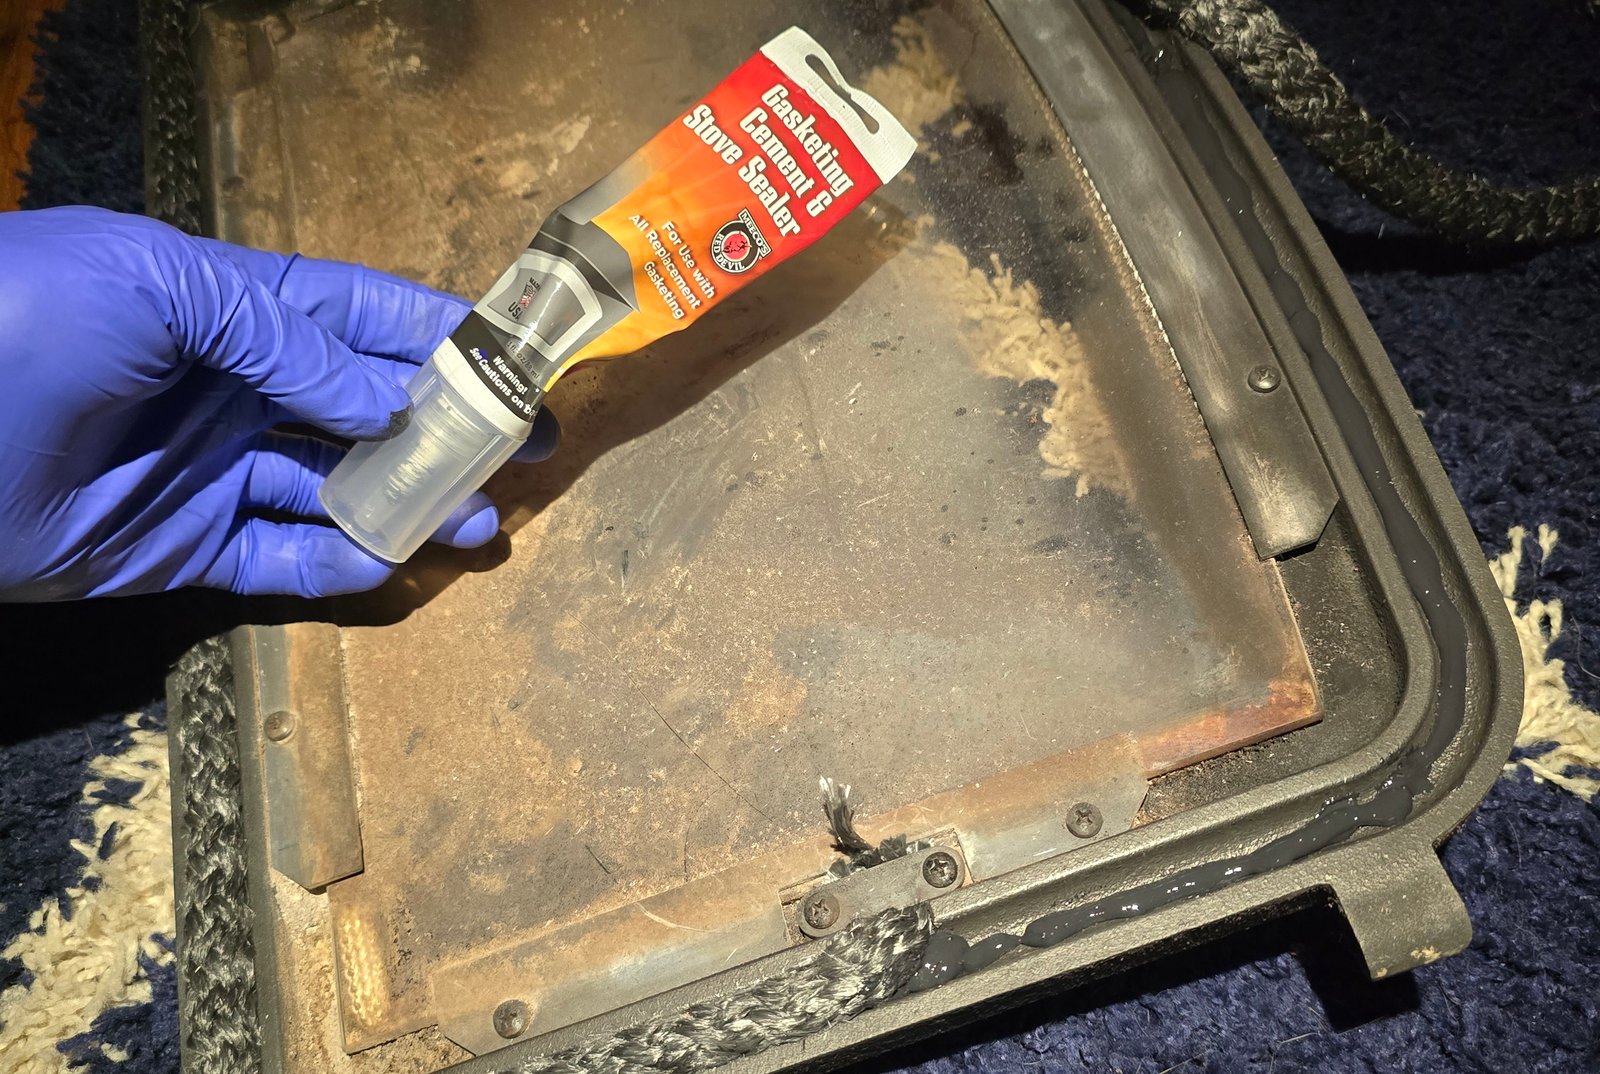
Step 7: Out With the Old In With the New.
It was time to install the new felt. I added a bead of new door seal compound around the whole groove and secured one end of the new felt to the door by a special bracket. I wrapped the felt around the entire door, cut it to length and added a little extra glue at the end.
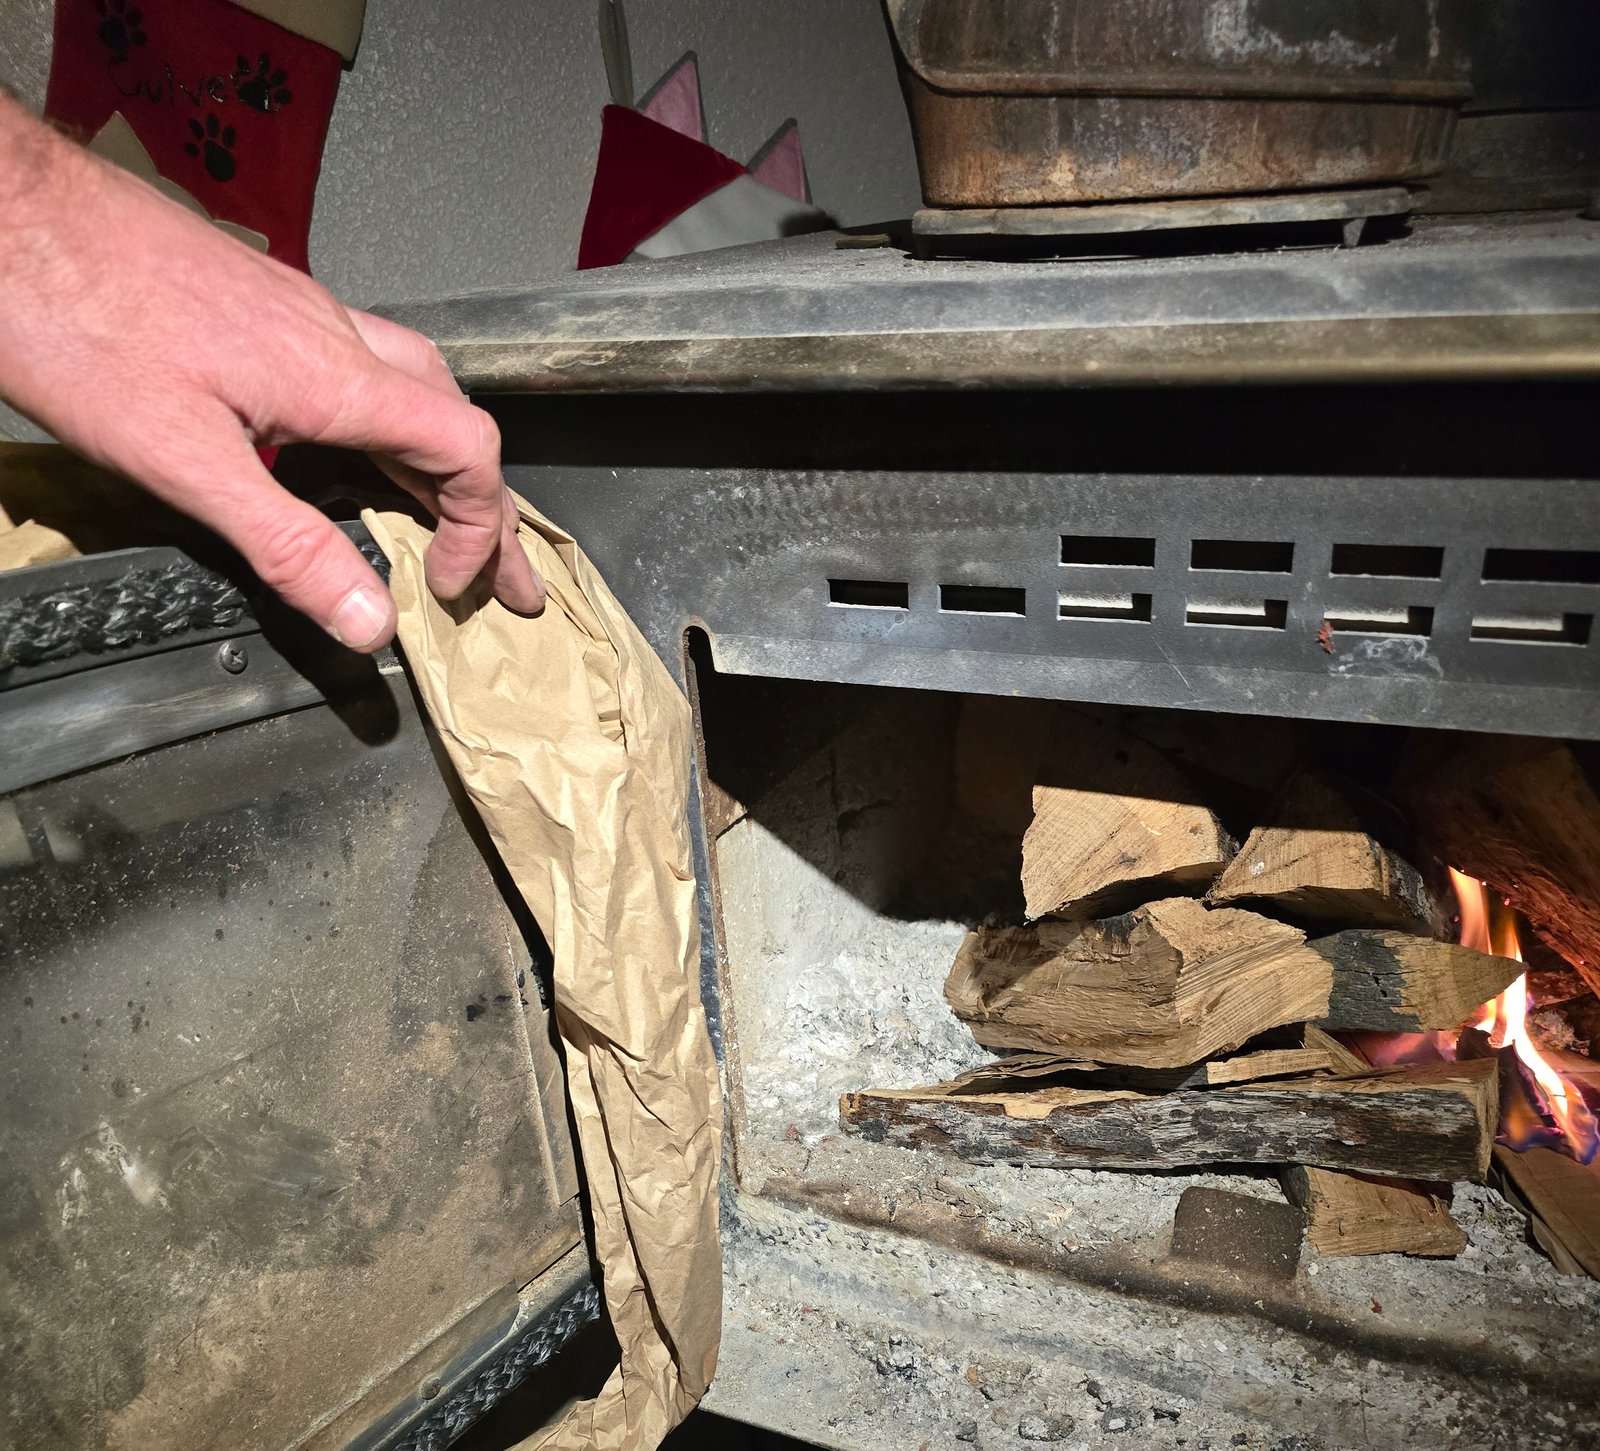
Step 8: Burn it In.
The final step was to cure the glue by starting a fire and letting the fireplace burn for 2 hours. I added a little piece of paper at the section of the door that got extra glue to make sure none got on the fireplace and started a blaze. I waited for the required 2 hours. And the job was finally done.
After years of fighting smoke, I feel like I was literally going insane. It feels so good to have a functional fireplace. Being able to enjoy the warmth of a cozy fire at the end of the day is one of my favorite things to do. And now I can do it carefree. I still don't know why this fireplace would smoke so badly. It makes no sense to me. Maybe the previous homeowners knew something I didn't, regardless of the issue is solved.